HP Laptop Not Connecting to Wi-Fi on Windows 10 – How to Connect?
Many windows 10 Users from all across the world are facing same problem that their HP Laptop Not Connecting to Wi-Fi with saved or new networks. If you are a PC user and upgraded to windows 10 lately, then you may have encounter with an error whenever you try to connect with Wireless network. It shows Limited or No internet access under the network settings icon which is at the taskbar. Luckily, resolving this error is a simple task you only have to apply the given solution.

Different software and hardware errors can be the outcome of HP laptop not connecting to Wi-Fi in windows 10. This may be caused by either an easy glitch or may be LAN being plugged in. So, you have to simply remove it and reboot to test. If it works, then well and good, otherwise try taking the help from an expert. There are certain steps by which you can easily connect your HP laptop to Wi-Fi in windows 10.
Fix HP Laptop not Connecting to Wi-Fi issue on Windows 10
The following are the troubleshooting steps you can attempt to fix your HP Laptop if it’s not connecting to Wi-Fi.
- Try Updating the Wireless driver of HP laptop
- Troubleshoot laptop Using HP Support Assistant
- Reset your Wireless Modem and Laptop
- Reinstall Wireless Adapter Drivers
- Hard Reset your Laptop
To troubleshoot your laptop and make it connect to your Wi-Fi again, use the below-mentioned procedure accordingly and carefully.
Method 1: Update Your Wireless Network Driver
There are various ways to update a system’s drivers. The easiest of them is to Install Windows Update if pending any.
- Search for Windows Update Settings on the Windows search bar.
- There you’ll see a Check for updates button. Click on it to see if there are any pending updates.
- Any pending updates would be installed automatically.
Try connecting to the Wi-Fi network again and see if your problem is solved. If not you can continue following the troubleshooting steps.
Method 2: Update System’s Wireless Network Driver Using HP Support Assistant
- Search for HP Support Assistant in the Windows Search box.
- You can download it from the official website of HP support Assistant if it is not installed already and then install it.
- After launching the HP Support Assistant on your HP Laptop, select your Laptop model or name under My Devices.
- Select Check for updates and messages option and look for any updates under MY PC.
- If any updates are available, you’ll see an option of Updates. Click on it and then install the latest Wireless Network Driver.
Method 3: Use Device Manager to Update Your HP Wireless Network Drivers
Another method you can use to update your Laptop’s drivers is through Device Manager.
- Right-click on the Start icon on the left corner of the taskbar.
- Select the Device Manager option from the list of options shown.
- Look for Network adapters and then click on it.
- Right-click to choose your adapter model and then hit the Update Driver option.
- Click on Search automatically for updated driver software options.
- Install any pending driver updates and check if your problem is resolved.
If the issue was with outdated Wireless Network Drivers, these steps would easily fix Wi-Fi conenction problem with HP laptop. But if there’s more to the problem, you need to keep reading and following the steps until your end up fixing your issue.
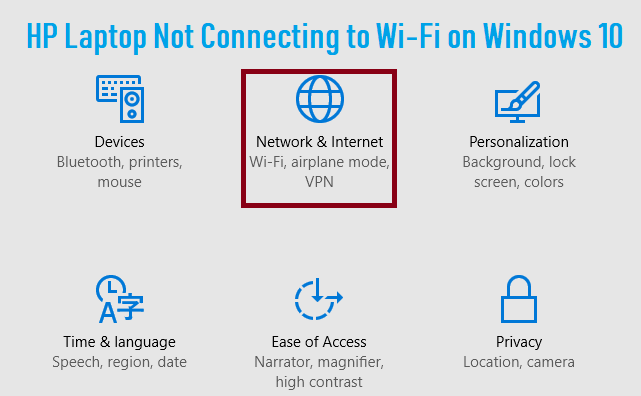
Method 4: Troubleshoot Automatically Using Windows Troubleshooter
HP Support Assistant is a tool that diagnoses issues with your laptop and fixes it automatically. You can use it for troubleshooting your HP Laptop if it is not connecting to Wi-Fi. Every HP Laptop gets the HP Support Assistant installed in it, however if you don’t have it you can simply download it from the HP Support Assistance portal. Or you can also follow the steps below to fix your issue using the built-in Windows Troubleshooter.
- Enable Wi-Fi by clicking on the wireless icon on your taskbar.
- Now right-click on the same icon and click on Troubleshoot problems.
- This will automatically open the Windows Network Diagnostic tool which will start diagnosing any issue with your Wireless connection.
- Once the Windows is done diagnosing the issue, you can see a list of problems with your Wi-Fi that you need to fix.
- Read the remedies mentioned and follow them as mentioned.
- After fixing all the issues shown, check if you can connect to Wi-Fi now.
Method 5: Reset Wireless Modem and HP Laptop
Sometimes a simple reset to your Laptop and Wireless Modem can fix all the issues. Use the below steps to know how to perform the task.
- Shut down your PC.
- Remove any power cord from your Wireless modem.
- Let it be like that for a minute and then attempt to re-establish the connection again.
- Connect the power cord to your Wireless modem again and wait until all the lights on it turn on.
- Try connecting any other device to your Wi-Fi and see if it can connect to it.
- If you think there’s something wrong with your Wi-Fi connection and if all the lights on it aren’t turning on, contact your broadband service provider.
- When your Wi-Fi starts working properly, open your Laptop and wait for it to connect to your Wi-Fi automatically. If your HP Laptop does not connect to Wi-Fi automatically, click on the Wi-Fi icon. Select your network option and then hit Connect.
Method 6: Reinstall Wi-Fi Drivers
If nothing seems to work and your HP Laptop is not connecting to Wi-Fi after following all the above-mentioned steps, then you should try reinstalling all the Wireless Network Adapter drivers. The following can be done simply from the HP Recovery Manager.
- First of all, disconnect any external USB wireless network adapter and restart your Laptop. After restarting your device, connect the adapter to another USB port.
- Search HP Recovery Manager in your windows search box.
- Select Yes when the User Account Control prompt shows up.
- Select the Reinstall Drivers option and choose your laptop’s wireless adapter option from the list of drivers.
- Click on Install and after it successfully gets installed, restarts your device.
Open your Laptop and try connecting to your Wi-Fi again.
Method 7: Perform Hard Reset
So, these steps would most probably fix your issue. However, if you are still facing the issue and your HP Laptop is not connecting to Wi-Fi, after all, then the last option is to perform a hard reset. To perform complete systems restore follow the steps given below:
*Note that performing a Hard Reset will remove the installed application, drivers, or updates but all your computer files will stay as it is. For safety, you can still make a backup before performing a Hard Reset.
- Press and hold the Power button for over 10 to 15 seconds.
- When you see the Windows logo, turn it off again and do this for at least three to four times.
- On the third or fourth run, you’ll be taken to Recovery Screen. There you need to select Advanced Options.
- Click on System Restore and then select the option that fixes your issue.
- Next, on the System Restore section select Choose a different restore point option.
- Select Next, and select the restore point when you didn’t have this issue.
- Click Next and then Finish to complete the restore.
Also Read: How to Fix ‘No Internet Secured’ Connection Error?
We hope you are able to use your HP Laptop Not Connecting to Wi-Fi issue. However if the issue isn’t solved still, you can contact HP Laptop Support for assistance. We are third party laptop support and we can fix all your HP laptop issues in a jiffy. Don’t waste your time and contact us right away for help.