
How to Clean HP Printer Heads?

 If you have been using a printer for quite some time then you will know how important it is to clean HP printer heads on a regular basis so that it runs longer.
The HP Print heads clog from time to time because of the deposit of small amounts of ink or dust particles. If it has been clogged then you will get to know about it via dappled or streaky prints. The print head can also get blocked if you don’t use the cartridge regularly.
If you don’t print for weeks then the cartridge will ultimately dry out and you will have to replace it with a new one. Cleaning the print heads on a regular basis will help you stretch your life and you will be able to print fresh copies regularly.
About the Print Head
The printhead is the component of the printer because of which the ink is transferred to the page for printing. This process is done by sending out small drops of ink through a number of printer nozzles to generate the print that you want. Even if a single nozzle gets clogged, it results in a faded printout.
Types of Print Heads
There are two types of Print heads. One is built into the cartridge and the other one is built in the printer.
1. Cartridge built-in Printheads
They are also known as integrated printer cartridges. The nozzle plate is included at the side of the cartridge. When you replace the printer cartridge, you will also have to replace the printhead. If you are facing trouble with a specific streaky cartridge then you can exchange it with a new cartridge to solve the problem.
2. Printer built-in Printheads
HP print heads that are built into the printer use separate ink cartridges to produce a print. The printhead for these types of cartridges is built-in the printer and the cartridges install into that printhead to create a print. These kinds of Printheads require replacement after you have used the printer for quite some time.
READ MORE- HP Printer Troubleshooting Steps To Resolve Major Problems
Methods to clean HP Printer Heads
You can either clean the HP printer heads manually or automatically. We will be sharing some easy steps to do it so that you won’t have to read a couple of blogs and waste your time.
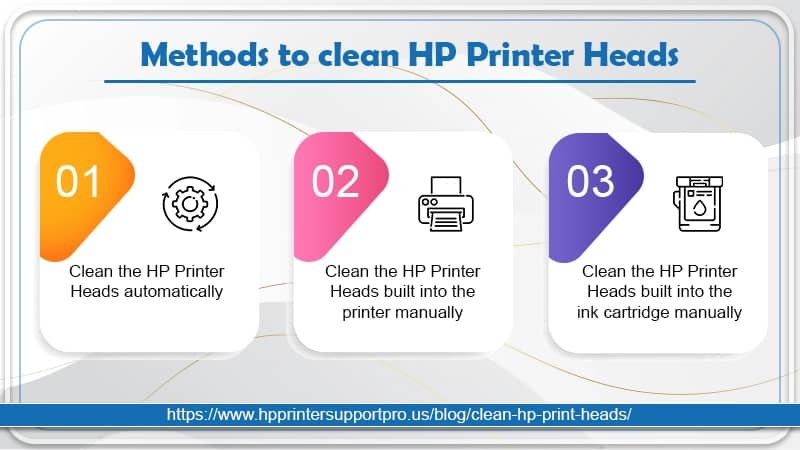
Method 1: Clean the HP Printer Heads automatically
The best way to fix your print quality issue is by running a cleaning on your printer. The cleaning function is a part of the software of every HP printer model and is typically found under the ‘printer maintenance’ tab of the printer’s display menu.
You can refer to the manual that came with the printer for particular instructions as per your printer model. Cleaning the Printer heads can take a minute or so and some ink is required as well for the cleaning process to take place.
Once it is done, you can run a test print to check the quality of the print. If it looks good then you can resume your printing task. However, if you feel that it requires an improvement then you can run the cleaning function 2-3 times so that you get the desired print quality.
If you are still not satisfied with the quality then you can try out the manual way to clean it as running the cleaning function frequently will exhaust the ink of the cartridges.
Method 2: Clean the HP Printer Heads built into the printer manually
This is a time taking process but it will properly clean the HP Printer heads. Before starting out, you will need:
- A plastic container
- Few dry paper towels
- Lint-free cloth
- Filtered/Distilled hot water
Once you have gathered the supplies, you can refer to the points mentioned below:
- Use a dry paper towel and fold it into quarters then put it in the plastic container
- Moist the paper towel with lukewarm water.
- Open the printer and take out the ink cartridges.
- Keep them apart and carry on with the cleaning process.
- Lift the grey latch to free the printhead from the printer.
- Pull out the printhead cautiously out of the printer.
- Take a lint-free cloth and dampen it with filtered water.
- Wipe off any extra ink from the print head’s nozzle easily.
- Put the printhead back in the vessel with the moist paper towel and be extra careful.
- Avoid touching the nozzles as they are fairly subtle
- Let it soak in for about 7-10 minutes and then remove it from the container
- Keep it on a dry towel so that it becomes dry and ensure that the nozzles are skyward facing
- Reinstall the printhead and don’t forget to latch it.
- Reinstall the cartridges run the cleaning program again and then try to print.
Method 3: Clean the HP Printer Heads built into the ink cartridge manually
If your printer uses the cartridges that are a part of the printhead then you can use the ‘paper towel method’ to fix the issue.
You will need a damp paper towel and a dry paper towel before we start with the process to clean it.
- Use a paper towel damped in warm water or a coffee filter and blot the cartridge.
- Ensure that the printhead is facing downwards on the paper towel as it will remove any dry ink that has been clogging it.
- Hold the cartridge along with the printhead facing downwards against a dry paper towel for about 2-4 minutes.
- The dry paper towel will take off the ink. Don’t wipe the print head as it has the potential to damage it.
- Install the cartridge and try to print again. If the print is not up to the mark then you might be required to replace the printer cartridge.
Also Read: Fix HP OfficeJet Printers Missing or Failed Printhead Error
Conclusion
We hope that we were able to help you to clean HP Print heads. If you have tried the methods that we have listed above but still face an issue then you might need to replace the printhead. If there is anything else that you would like to know then you can get in touch with the HP Printer Help and get an assured solution.


