
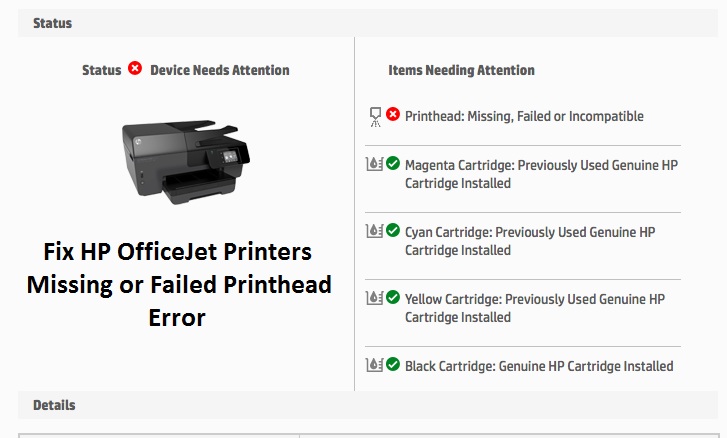
Fix HP OfficeJet Printers Missing or Failed Printhead Error

When you install a new printhead, a ‘Missing or Failed Printhead’ error message is visible on your printer control panel and it does not print. An unlatched or inappropriately seated printhead can lead to this error. So, to Fix HP OfficeJet Printers Missing or Failed Printhead Error, perform the given suggested steps and get the solution instantly.
Fix Missing or Failed Printhead
Given are the simple steps that you can follow to get rid of this HP OfficeJet Printers Missing or Failed Printhead Error.
Method 1: Reset the Printer
Perform these steps to restart the printing device.
- Turn on your print device.
- Wait for a while till your printer is sluggish and silent before you continue.
- As the printer is turned on, detach the power cord from the back of the printer.
- Release the power cord from the wall outlet.
- Wait for a while, like for 60 seconds.
- Attach the power cord back into the socket.
- Connect the power cord back again to the back of the printer.
- Switch on your printer if it is not automatically on.
- Wait till your printer is sluggish and silent before you proceed further.
- If these steps fix your issue, you need not to continue troubleshooting.
- If the issue continues, perform the next solution.
Method 2: Reseat the Printhead
Perform the given steps to reseat the printhead.
Unseat printhead
- Put your fingers in the slot on the left side of your printer, and then pull it forward to open the cartridge door. The carriage transfers to the left side of the printer. Wait till the carriage is sluggish and silent before proceeding further.
- Release the power cord from the back of the printer. Releasing the printer avoids the carriage to move.
- Uplift the carriage latch.
- Clasp the sides of the printhead, and slightly uplift the printhead without taking it out from the carriage.
Keep the printhead back to its position, and then put down the carriage latch
- Insert the printhead back again to the carriage to reseat it. As you keep the printhead into the carriage, it relaxes into the carriage as it seats.
- Gradually keep the printhead to the left and right to ensure that the printhead fully seats in the carriage.
- Put down the carriage latch.
- Ensure that the carriage latch is down.
- Shut down the ink cartridge door.
- Connect the power cord again to the back of the printer.
- Hit the Power button to turn it on, if the printer does not turn on by itself.
- Wait till the warm-up period is over and your printer is inactive and silent before you proceed further.
- If these steps fix your issue, there is no need to proceed further with the troubleshooting.
- If the issue persists, move to the next step.
- Reseat the printhead up to three times
At times error messages continue after inserting the printhead. To fix any error messages, reseat the printhead by reiterating all the above steps up to three times.
- If the suggested steps fixed the issue, do not continue the troubleshooting.
- If the issue continues, move to the next solution.
Method 3: Substitute the Printhead
If you have completed all the troubleshooting steps and still experiencing the same problem, then replace the printhead.
Examine the printhead warranty status
If you have a faulty cartridge or printhead, it might be under warranty. To confirm the warranty on your ink or toner supplies, visit the Printer and Page Yield Overview. And from there check the restricted warranty information for your supplies.
Order the printhead
If the HP exchanges the printhead assembly under warranty, then you will get a kit with a new printhead assembly, guidelines, and a full set of SETUP cartridges. If you own an HP Instant Ink, then you might also get a new set of Instant Ink cartridges. You must fix the SETUP cartridges first, or a cartridge error arises.
Replace the printhead
If the error persists, then the next step is to replace the printhead.
- If these steps set the issue, you do not need to continue further.
- Move to the next solution if the issue still persist.
Method 4: Service the printer
After completing all the above-mentioned steps, if the issue persists, then the last way to get rid of this is Service or exchange your HP product.You can also solve your printer’s daunting issue by deleting and re-installing the printer’s Drivers and Software, go to 123.hp.com/setup to download and install Drivers.
If again the issue continues, then contact HP Printer Helpline. Experts will help you out to get rid of this error. You can call 24 hours as they are available round the clock.


