
How to Change Ink in HP Printer? – A Stepwise Guide
To benefit from a well-functioning HP printer, you must examine and replace the old ink cartridges with the new ones. It’s a significant task that every HP printer user must know how to perform. Even a single tiny mistake can lead to many issues in this process. But don’t feel intimidated and think the process to be a hard one. When you know How to Change Ink in HP Printer, you won’t complain about getting poor quality prints. In this post, you’ll read stepwise instructions for the entire process of changing ink cartridges on any HP printer model. They will undoubtedly prove useful when you find a low ink warning message.
Points to Note Before Changing Ink Cartridge in HP Printer
In order to ensure a hassle-free ink cartridge changing process, you must be aware of specific points. They are listed below.
- Always buy a genuine ink cartridge for your HP printer. Some cartridges that aren’t compatible with your printer can cause various issues in their working.
- Ensure to replace the cartridge when you notice a drop in the ink level showing on the Control Panel screen.
- Write down the cartridge type and number as the labeling and numbering system changes with the model type.
- HP has its own line of inkjet hardware specific to a country. So, your printer will prompt you for the particular label and serial number on your HP ink cartridge.
Also Read HP Ink System Failure
How to Change Ink in HP Printer
The process of replacing ink cartridges is not a lengthy one. However, you must perform it carefully by understanding the instructions. To find out how to change ink cartridge in HP printer, adhere to this stepwise sequence.
Check the Ink Levels
Before substituting a cartridge, you must examine the estimated ink levels. For doing so, just hit the ‘Ink droplet’ icon on the LCD of your HP printer. Now you can find if any cartridge requires to be replaced. You must proceed forward if the estimated ink levels are pretty low.
Load the Paper
The next step in changing the ink cartridge is to load the paper. Follow these points correctly.
- Raise the printer’s input tray.
- Next, lower the output tray and pull the tray extender.
- After that, slide the paper width guide. Slide it to its outer position.
- Load plain paper into the tray.
- Slide the paper stack till it stops.
- Slide the guide against the plain documents.
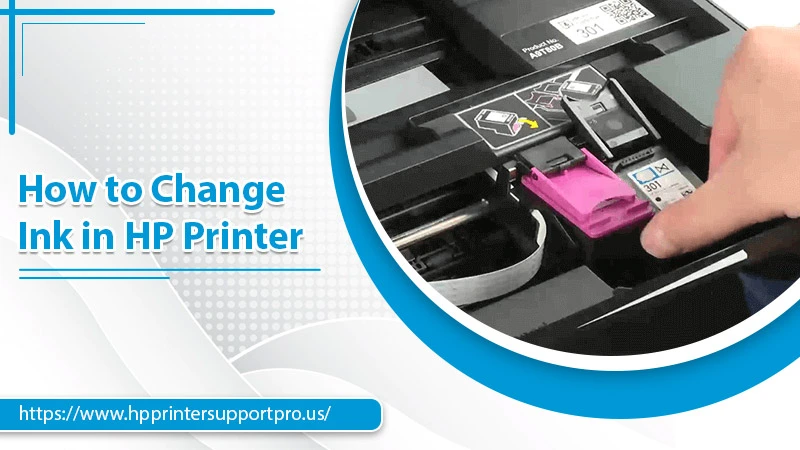
Change the Cartridge
Changing the cartridge requires you to follow a few specific steps. These are as follows.
- Load the plain white paper into the printer’s input tray.
- Next, press the Power button to switch on your printing machine.
- After that, open the ink cartridge door and wait for a few seconds. The carriage will shift to the printer’s center.
- You must wait till the carriage is idle before going ahead.
- Lightly press the ink cartridge to release it.
- Next, pull the cartridge out and take it away from its slot.
- Now, remove the new ink cartridge from its package. Pull the tab to take away the plastic tape.
- Hold your ink cartridge by its side. Its contacts must be towards the printing machine.
- Now, you need to insert the cartridge into its respective slot. Push it forward into its slot till you see it snapping into its position.
- Close the access door of the ink cartridge.
- Lastly, hit the button beside ‘OK‘ on the control panel display.
Align the Printer Cartridge
The last step is to align your ink cartridges. Here are the instructions to do so.
- Lift the scanner lid.
- After that, position the alignment page, ensuring that its printed side is down. It is on the right front of the glass.
- Next, close the scanner ID.
- Press the button beside ‘OK‘ on your control panel.
- After you notice the alignment getting the message, you will find it being displayed on your control panel screen.
- At this point, hit the button beside ‘OK‘ on the control panel. This action will finish the alignment.
- That’s it. Now you know pretty well the answer to the question, ‘how do you change ink in HP printer.’
Also Read Fix HP Printer Check Ink Cartridge Error
How to Change the Ink in a HP Printer 2140 Fax Model?
To change ink in the 2140 Fax printer from HP, you need HP 701 Black Inkjet cartridge. The process to change ink in this model is applicable to HP Envy series models, HP Officejet series models, HP Deskjet, HP Photosmart, and HP Designjet series models.
- Open your printer and hit the cartridge access button. It is present on the Control Panel.
- Now, replace the old cartridge by pressing it down. It will take it away from its slot.
- Unpack the new cartridge and take away its tape. Now push it back into its slot.
- Ensure that when you attach a new cartridge, its copper-colored face is towards the rear end.
- Now, close the compartment panel of the cartridge.
- Realign the cartridge by hitting the Start button in the Control Panel of your printer.
- For cartridge installation, press 1. Your HP printer will print an alignment page, and you’ll see 06 on your printer’s screen.
- Now, assess the printout that appears and dial the code mentioned on it.
- Hit ‘OK‘ to finish the realignment.
How to Replace the Toner Cartridge in Your HP Laser Printer?
The toner cartridges in HP Laserjet printers have in-built drum units. So, you will have to change the toner and the drum unit on the printing device. Many people ask ‘how do I change the ink in my HP printer’ as they are confused about replacing both toner and drum unit. To change the toner cartridge, you should open the scanner assembly, its top cover, and take out the old toner cartridge. Follow these steps to understand it better.
- Carefully lift the scanner assembly and then open the top cover.
- Now take out the old toner.
- Keep away the used ones in a bag. Now find an orange clip on the new cartridge.
- Remove the orange clip. Do it by pulling in the upward direction.
- Use your hands to grasp the sides of the cartridge and dispense the toner by rocking the cartridge back and forth.
- There’ll be a tab on the left part of the toner cartridge.
- Bend it till it breaks loose. Pull it till the ceiling tape is taken away from the cartridge. Keep the tab and tape in the cartridge box.
- Lastly, align the new cartridge with the tracks within the printer.
- Now push the cartridge till it’s properly seated.
- You can close the top cover and gently lower the scanner assembly.
Final Thoughts
By now, you must be thoroughly familiar with how to change ink in HP printer. Although the process may seem long, yet it’s essential to follow it in a step wise format. Proper installation of the cartridge will prevent the printer from malfunctioning. If you need more assistance with the process, or are facing any HP printer problems, go ahead and connect with expert printer support services.