
How to Connect HP Printer to Mac?
If HP printer can not connect to Mac computer then printer is powered off, or a USB cable connection has become disconnected. For wireless HP printers there could be a wireless connectivity issue. To connect HP printer to Mac there are some specific steps. To know the process of connection between these two devices, grab HP Technical Support from the top-most techies. They will render you all the desired possible solution related to this problem at an easier form.

Although HP wireless printers have spotted Mac support for older printer models as well as some older versions of Mac OS X. The current versions of HP printers work fine with Mac OS X. If you have an HP printer and want to use it with your Mac, you may only need to download drivers from the HP website. After downloading the printer driver in your Mac OS X, the printer will start printing.
Steps to Connect HP Printer to Mac Computer
Following are the steps through which you can connect HP Printer to Mac easily. So, go through all those written-steps one-by-one and establish the connection in both the devices:
- Click the “Apple” icon first and then choose “Software Update”. This will check for any updates of HP printer that you may have neglected
- Click on the “Power” button to turn-on the HP printer
- Use the USB cable to connect your HP printer to your Apple computer
- Hit on “Apple” icon and then choose “System Preferences”
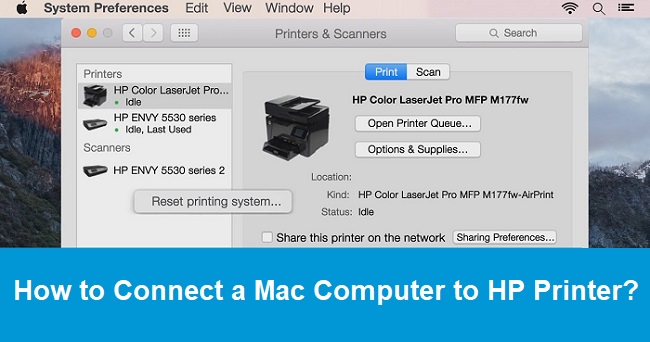
- Click on “Print and Scan”
- Click on the plus icon. You are required to type your administrator name and password in the box
- Choose the HP printer from the list that you want to add
- Click “Add” and then your HP printer will get connected to your Mac
Alternative Steps to Connect HP Printer to Mac
Apple AirPrint is a built-in printing solution for iOS and Mac OS providing high-quality printing without even drivers download or installed. Before using AirPrint, it is required to connect the printer to your Mac computer or to the same network that Mac is connected to. If AirPrint not working then fix it first. Walk through the given instructions step-wise to learn more for connecting the devices each other:
- Turn your printer ON first, and then connect it to the network or the Mac computer
- Wireless connection for printers with touchscreen or LCD menu control panels: On the printer, select “Setup”, “Network”, or “Wireless” menu, optfor the Wireless Setup Wizard, and then follow the on-screen driven directions to connect the printer properly.
- Wireless connection for printers with buttons only: Press and hold the Wireless button for couple of seconds until the wireless light blinks on the printer. Press the WPS button on your router, and then wait for a while until the printer connects to the network successfully.
- USB connection: Connect the cable to the USB port on the rear of the printer and to an available port on the Mac OS.
- Wired (Ethernet) network connection: Connect the network cable to the printer Ethernet port and to an available port on the router or access point. At the port, the green light should be stable and the orange activity light should blink.
- Open a document or photo that you would like to print, click “File” tab, and then click “Print”.
- If your printer is listed in the Printers menu, click the printer name and try to print. Now check to print a text.
- If your printer is not recorded in the Printers menu, it might display under Nearby Printers.
Add an AirPrint Printer to Mac Printer Queue if Printer is not Listed
- First tap on“Apple” menu, go to “System Preferences” section, and then click “Print & Scan” or “Printers & Scanners” tab
- Have a glimpse of the “Printers list” for your printer name availability, and then perform the following tasks:
- If your printer is recorded into the given list, remove and re-add the printer to ensure it is set up for AirPrint. Click the printer name, tap onto the minus sign to remove the printer, click the plus sign, click Add Printer or Scanner, click the printer name and then continue to the next step.
- Further check if your printer is not listed, click the plus sign, click Add Printer or Scanner, click the name of your printer, and then continue to the next step.
- If your printer is not listed in the “Add Printer or Scanner” window, then there might be having connectivity issues. So, first resolve connection issues and then try again to add the printer. Then after continue to the next step.
- Check AirPrint or Secure AirPrint displays in the Use or Print Using menu. Once it is confirmed, give a click on “Add” tab
- Open a document or photo you want to take the printout, click File, and then click “Print”
You can connect both the devices by following the above guidelines. But some trouble can be faced by you while using these points. In that condition, you should nothing to do except giving a ring at HP Printer Tech Support Number. Your call will be entertained by one of our proficient tech-geeks whom you can rely. They will let you inform all the possible solutions with an ease.


